- Posts: 559
- Karma: 1
- Thank you received: 193
- Home
- Forum
- General
- The shipyard
- Tutorials
- Making an island
 Making an island
Naval War HQ created the topic: Making an island
- Naval War HQ
-
 Topic Author
- Offline
- Administrator
-

8 years 11 months ago
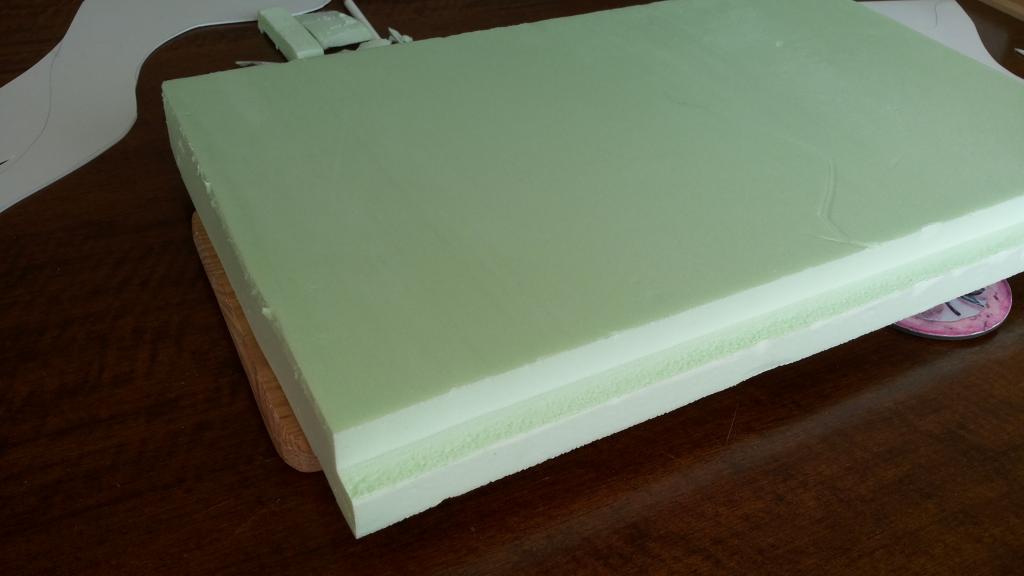
Made an outline of the island that I want in thick plasticcard

Then started cutting syrofoam in chunks that would fit on the plasticcard outline
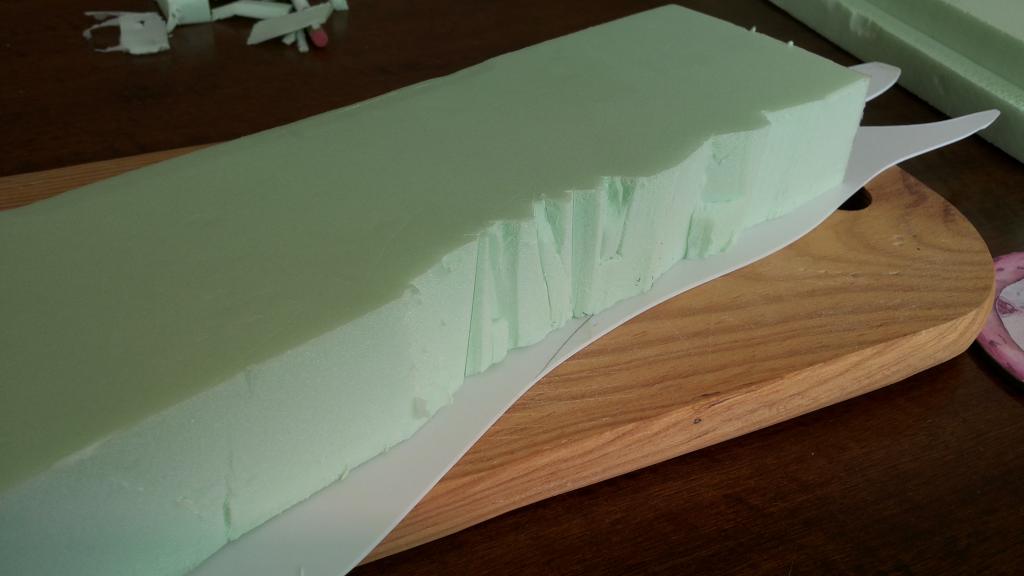
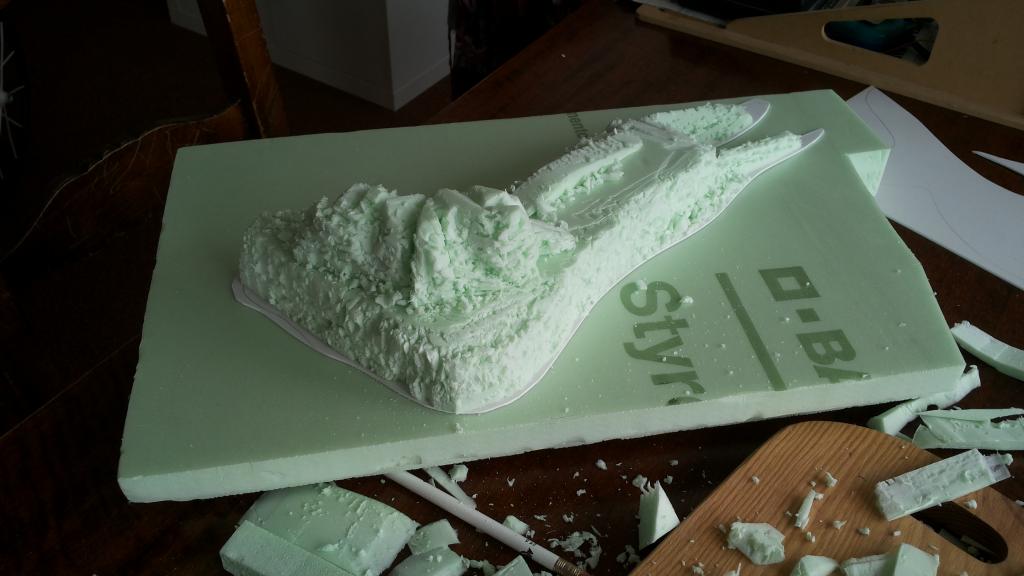
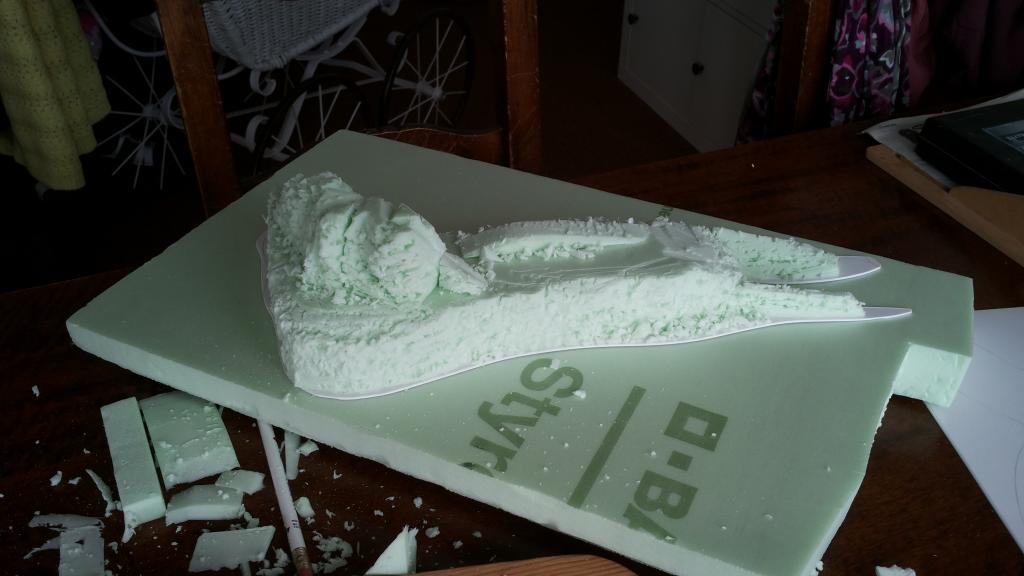
After glueing everything together and letting it dry I went completely overboard with my exacto knife on the syrofoam") Note that except for a rough horizontal pattern I did not 'try' to get rock shapes or anything, just let it all go and cut it up till your satisfied with the result.
Note that except for a rough horizontal pattern I did not 'try' to get rock shapes or anything, just let it all go and cut it up till your satisfied with the result.
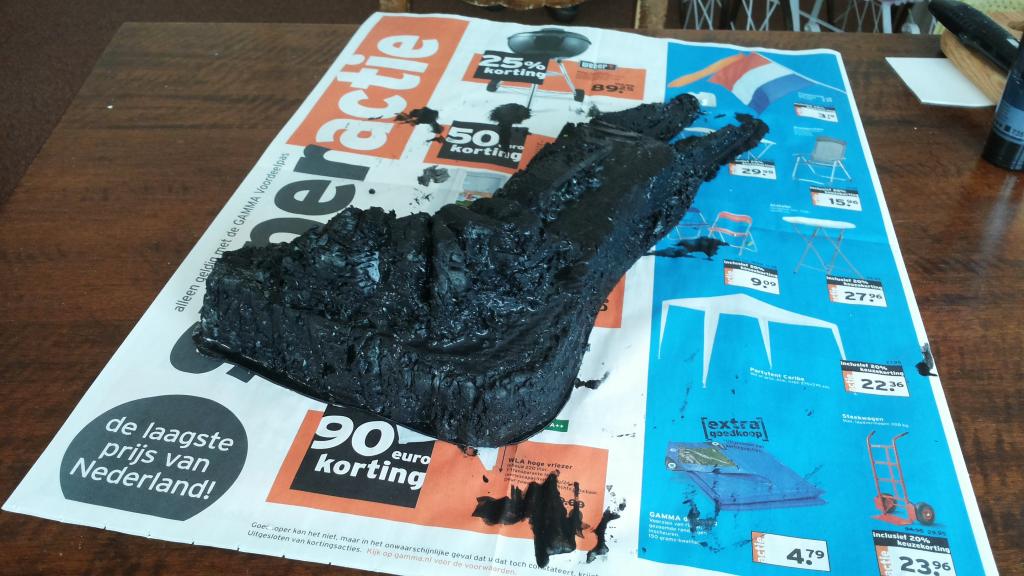
Then covered it with a mixture of wood-glue, sand and black acrilic paint to make sure it becomes a bit sturdy and gets a bit of a grainy texture.
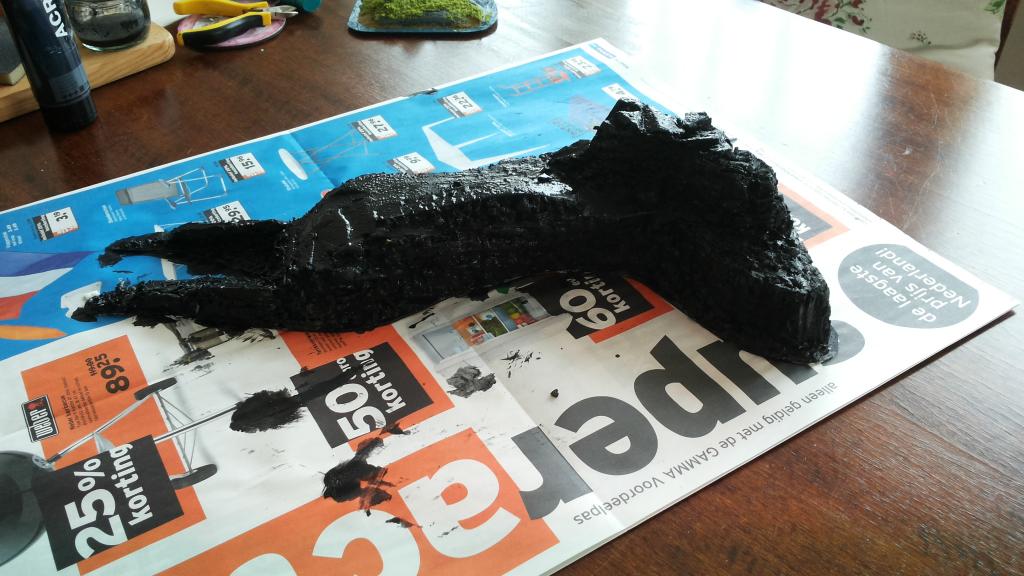
After the first coat has dried I made a second run with a spray can of black primer to make sure the black got in every corner and recess.
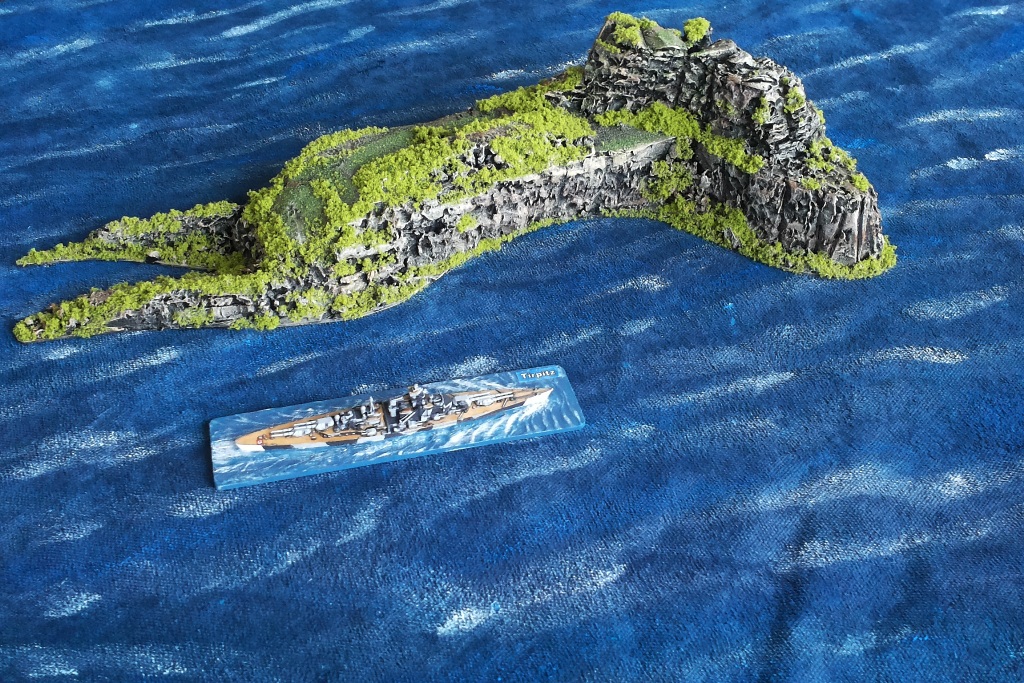
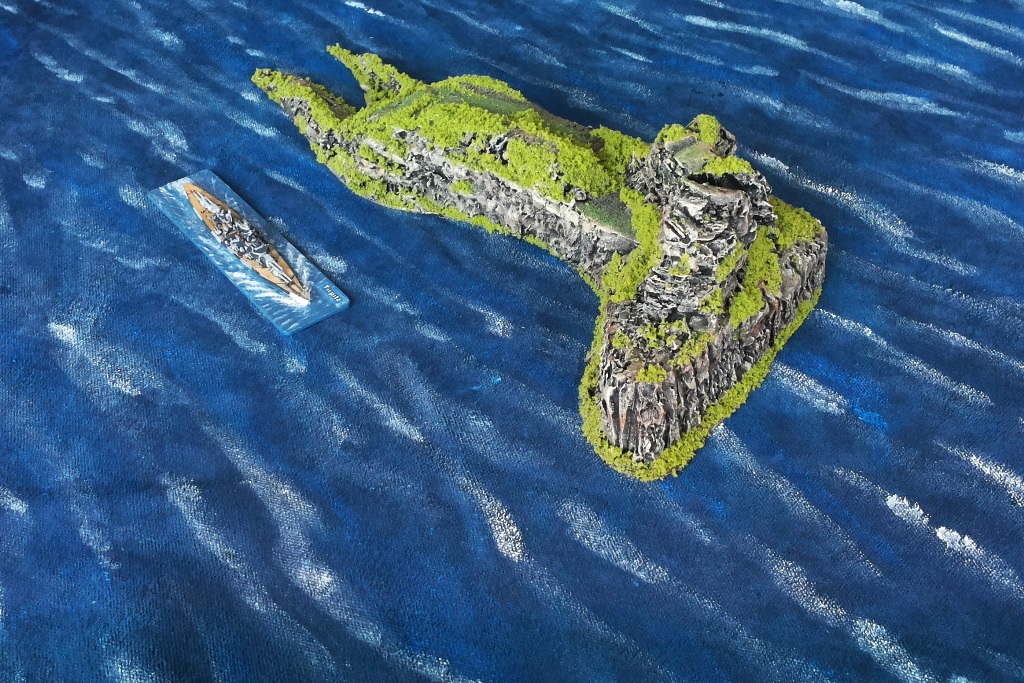
Finally, after the black undercoats have dried I gave it a drybrush with subsequential coats of dark brown, brown, sand and finally a bit of white.
Finish up with flocking the piece and voila; a nice island for my sea maps")
Game designer
"That which hath been is now; and that which is to be hath already been;" -Ecclesiastes-
So, I've been working on some scenery for my Naval War games. This is how it turned out:
The following video inspired me to try their technique, so credits where its due:
Made an outline of the island that I want in thick plasticcard
Then started cutting syrofoam in chunks that would fit on the plasticcard outline
After glueing everything together and letting it dry I went completely overboard with my exacto knife on the syrofoam
Note that except for a rough horizontal pattern I did not 'try' to get rock shapes or anything, just let it all go and cut it up till your satisfied with the result.
Then covered it with a mixture of wood-glue, sand and black acrilic paint to make sure it becomes a bit sturdy and gets a bit of a grainy texture.
After the first coat has dried I made a second run with a spray can of black primer to make sure the black got in every corner and recess.
Finally, after the black undercoats have dried I gave it a drybrush with subsequential coats of dark brown, brown, sand and finally a bit of white.
Finish up with flocking the piece and voila; a nice island for my sea maps
Game designer
"That which hath been is now; and that which is to be hath already been;" -Ecclesiastes-
Last edit: 6 years 8 months ago by Naval War HQ.
The following user(s) said Thank You: Bezmozgu
Please Log in or Create an account to join the conversation.